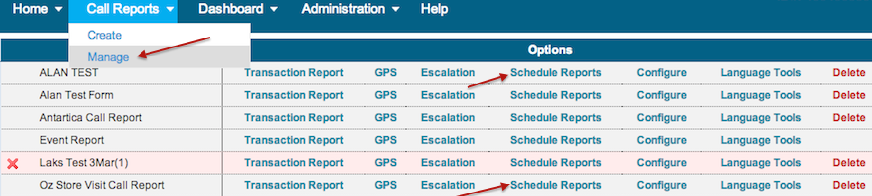
'Schedule Reports' feature allows the administrator to scheduled an automated task of emailing a particular call report. On Manage Call Report page, click on 'Schedule Reports' link against the call report in consideration to open the scheduling wizard (as shown below):
Once you click on the 'Schedule Reports' link, the following page is shown. Click on the 'Create a New Scheduled Report' tab to open the Scheduling wizard.

Scheduling wizard takes you through 4 steps.
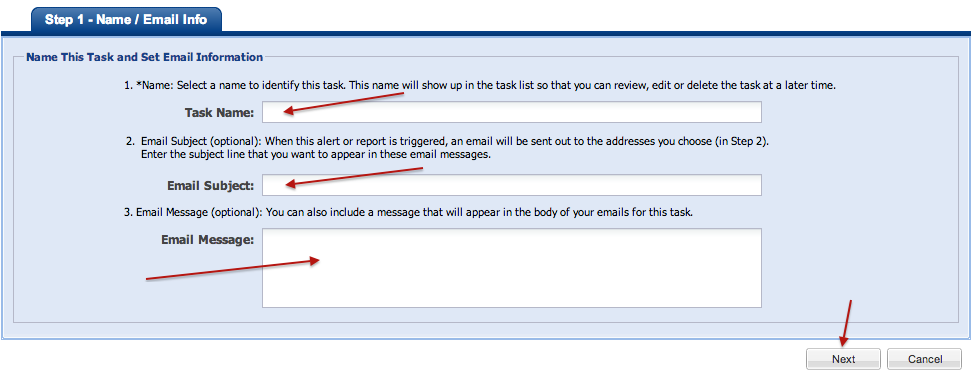
Step 1 - Adding Task Name, Email Subject and Email Message Content
Here you can assign this task a name, configure the email subject and message
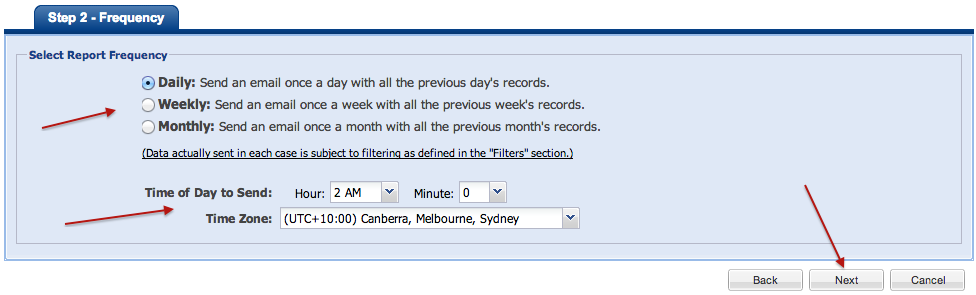
Step 2 - Set the frequency of emailing
Scheduled Task frequency can be chosen as Daily, Weekly or Monthly. Based on the frequency chosen, the report data will be generated for the previous day or week or month. The approximate time when the email has to be sent also can be configured. This is time zone sensitive. Email recipients can be chosen. Note: Report data is subject to chosen filter conditions which is the last step in the wizard.
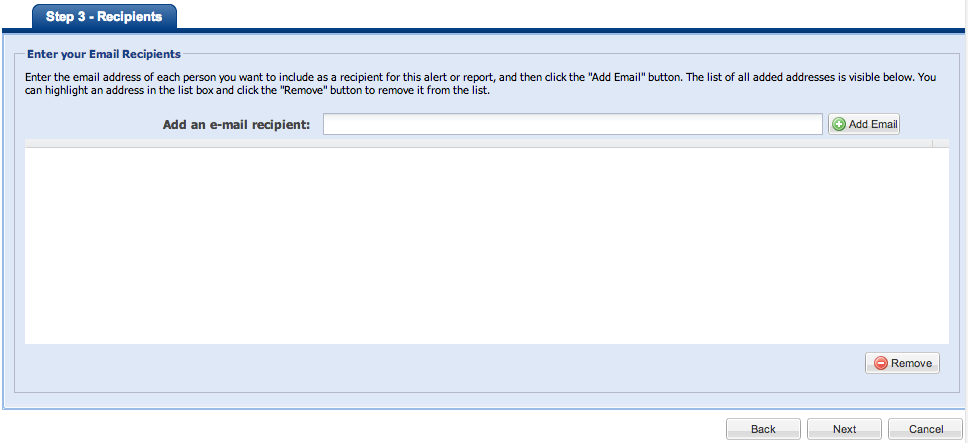
Step 3 - Adding or removing email recipients
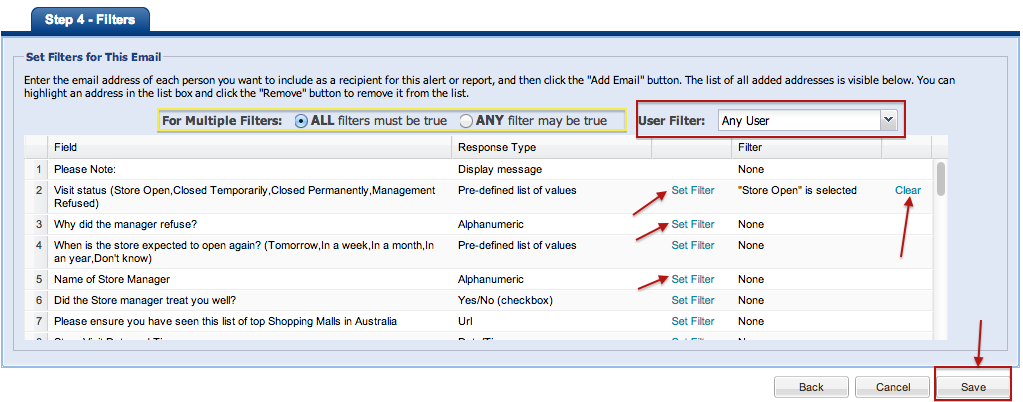
Step 4 - Filters:
This is the step where you set the filter conditions for the report. All field items in the call report form are listed down here. Each item has a corresponding 'Set Filter' link. Click on that if you need to set a filter condition based on the response type of that field item. Blanket conditions such as 'All filters must be true' or 'Any of the set filters must be true' can be chosen. You can also choose a user name based filter. Once this step is complete, click the 'Save' button at the bottom to complete scheduling.
It must be noted that although Escalation and Scheduling are similar, Escalation sends a single call report each time the escalation trigger / criteria is met. Scheduled reports are recurring and will group all of the records that meet the criteria and send an Excel attachment containing those records.