User List Management
User List panel is on the right side of User Management page. This panel is to add, edit or remove users from the system. As you can see in the picture below, individual users are listed in this panel. They are also grouped under specific user roles/titles.
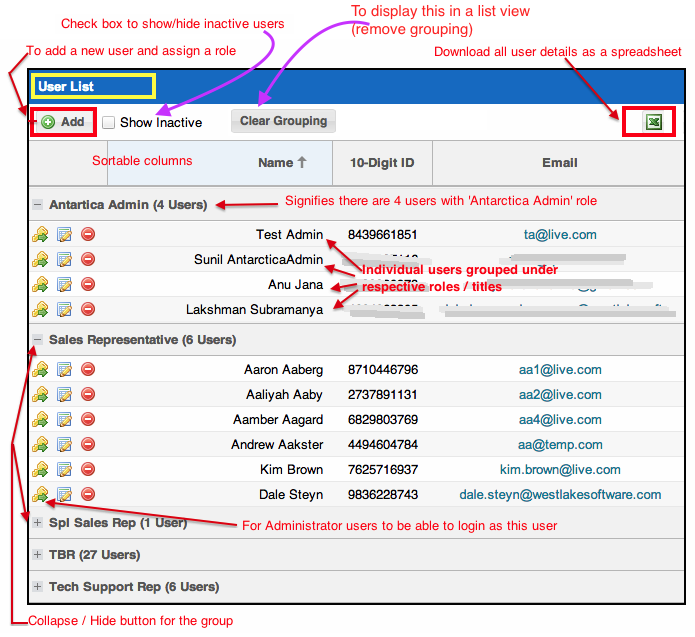
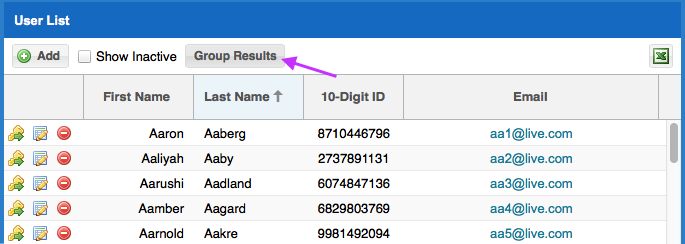
Clicking on the 'Clear Grouping' button will display the user list with out being grouped on their roles / titles (as shown below). Clicking on the 'Group Results' will apply the grouping back.
User list can be sorted based on the column headers. If the grouping is ON, the sorting will be effective only with in the groups.
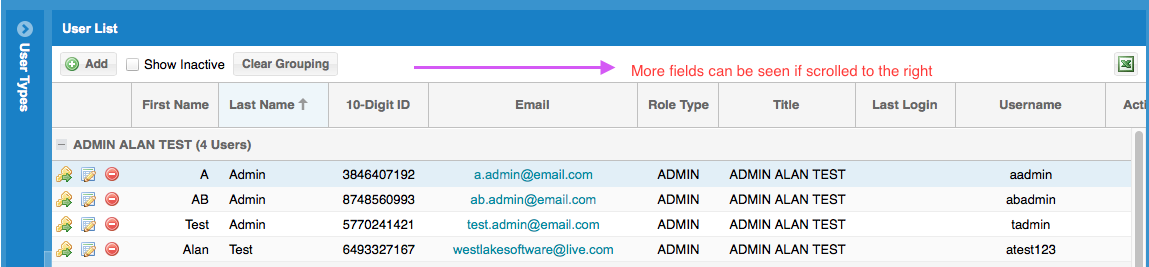
The following details about a user is displayed:
*This data will be automatically fetched from the user's handset while records are submitted to the server.
The Key icon to the left of a user list record enables the Administrator to login as that user and access their account. This is also used by support team to reset login credentials and / or if the user needs assistance.
![]()
User list can be sorted based on the column headers. Checking / unchecking the 'Show Inactive' box will Show/Hide inactive User. You can download all the users in the system as an excel spreadsheet by clicking on the excel icon at the top right corner of the panel (refer to the first picture above).
A new user can be added by clicking on the 'Add' button at the top left corner of the panel.

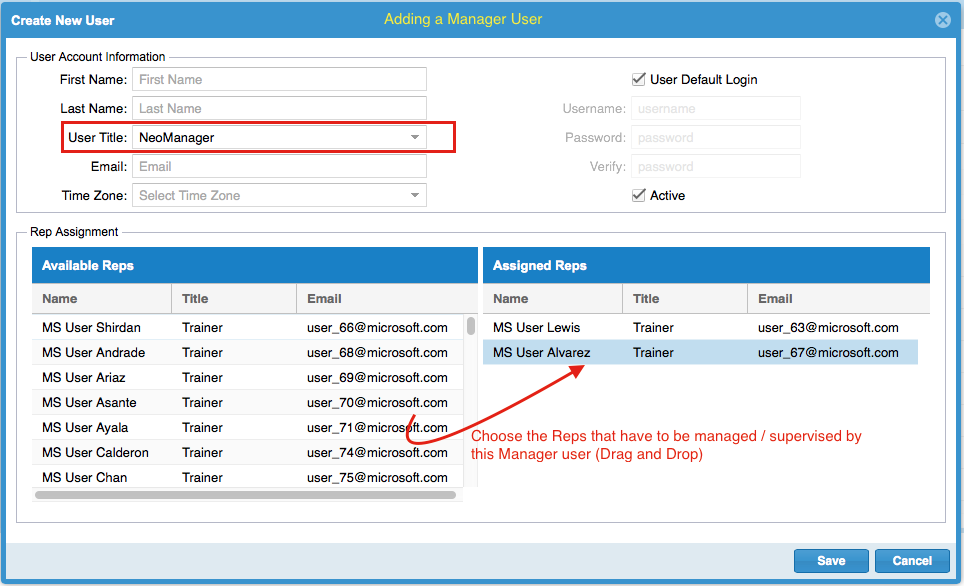
When adding a new user, you will need to select the role/title, enter First name, Last Name, Email, User Name, Password, and User Type(title).
While adding Representative level users, you will be able to assign them to Managers. While adding Manager users, you will be able to assign representatives to them.
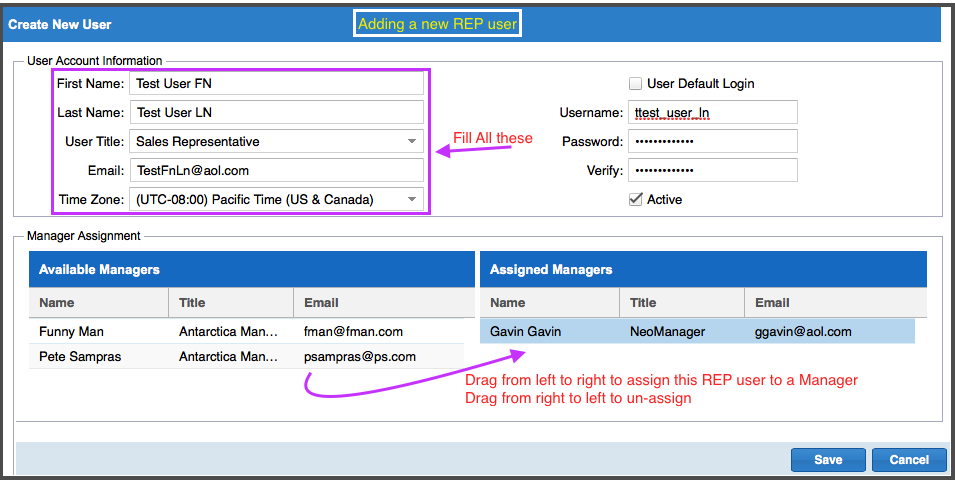
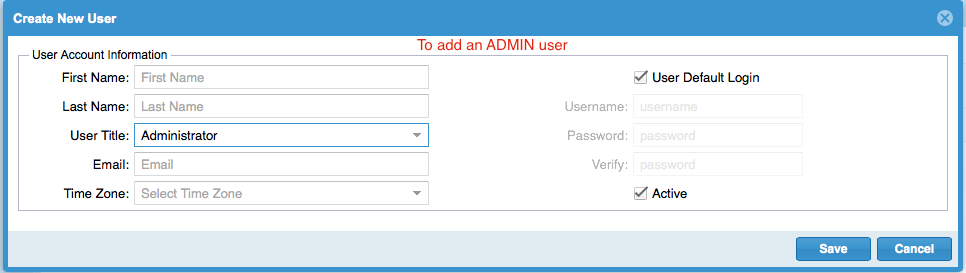
There are two ways to set up the user's login credentials: the Default way and the Administrator Defined way.
Default: If you choose this option, the system will automatically create login ID and password. For example, if the name of the new user is John Smith, the initial user name and password will be jsmith and jsmith respectively (first initial and last name). Once the user logs in for the first time, he/she will be prompted to change these credentials.
Administrator Defined: An administrator can create a unique user name and password for this user at this time if you wish by un-checking the 'Default Login' box. But, the 10 digit User ID number will still be auto generated by the system. This will display on the welcome page of each user; this can also be accessed and viewed by the Administrator when looking at Users listed in User management database. This number is necessary to login to REP client application on hand held devices such as Surface, Windows Phone devices etc.
The 'Active' check box is a way to keep a user in the system but remove their access to the server. This might be a person on leave or someone who has been terminated where you want turned off right away but not necessarily deleted.
Once a user role is created, it will get listed in the User List panel.
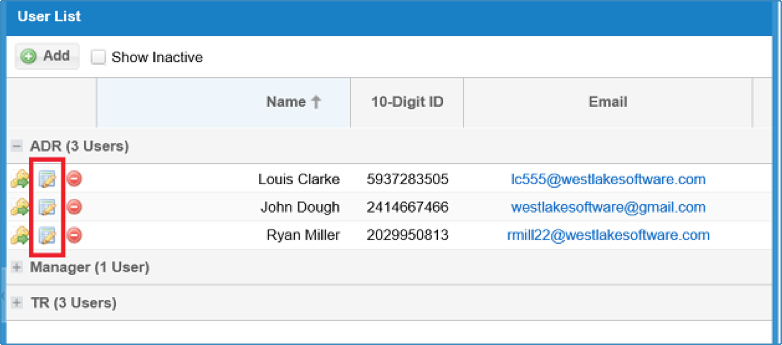
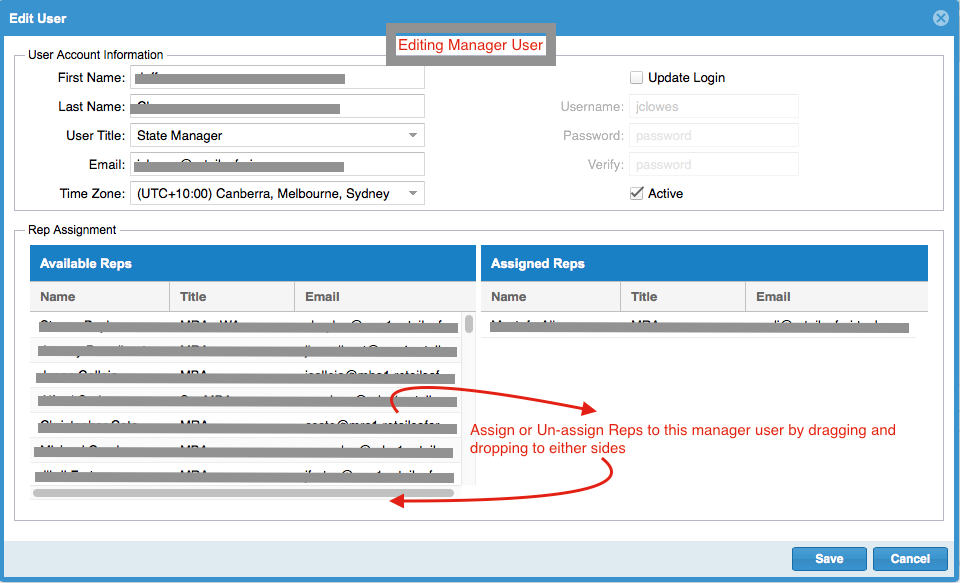
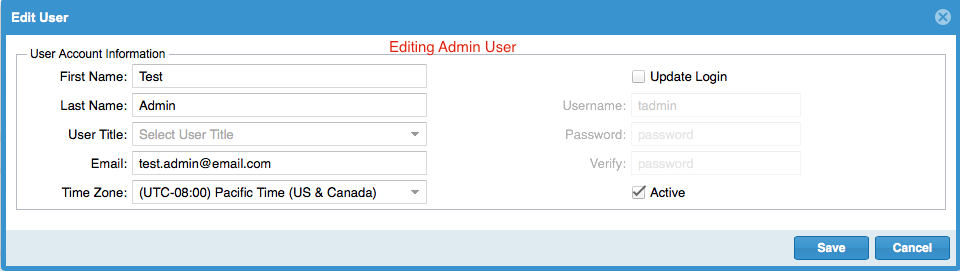
To edit a user, select the 'Edit' button on the user record (as highlighted in the picture below). This will pop-up a window similar to Add user window. Here you can change the user's role/title, details (name, email etc.) and login credentials. With easy and user-friendly drag and drop features, making assignment changes for reps and managers will be easy and more flexible. Make necessary changes and hit the 'Save' button.
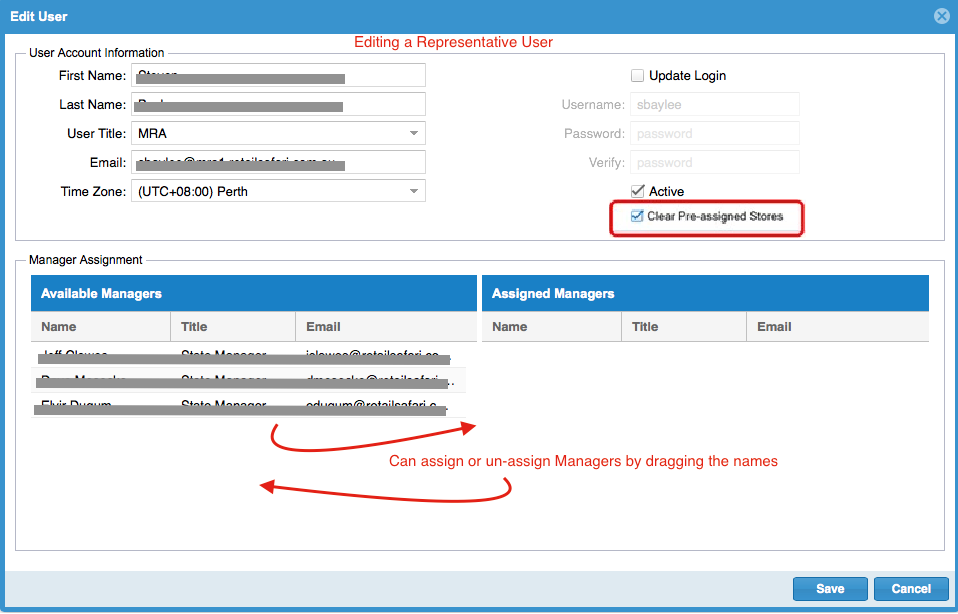
Admins ca un-assign stores from an inactive user. Use the check-box 'Cler Pre Assigned Stores' added to the Edit user window, and the Save.
Note:
Inactive Reps will now be listed and denoted with an Inactive label after the name.
Note:
User role cannot be changed once added.
Note that if the user is presently in a compliance active role, a pop-up message will offer a warning with implications. Also be aware of the changes in access privileges when changing the role of a user. Please refer to this section to get an idea of access privileges for various predefined user types.
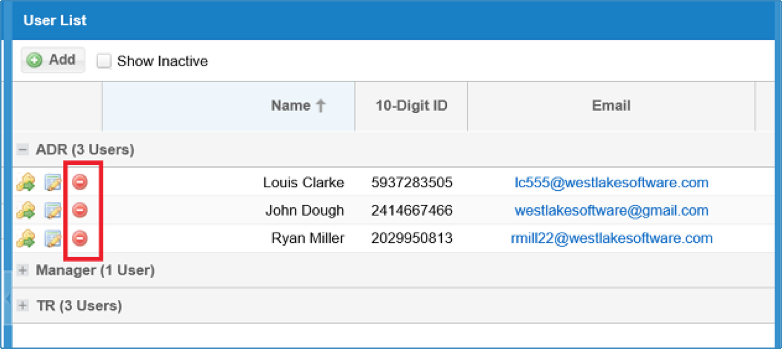
To delete a user, select the Delete icon on the left (as highlighted in the picture below); next to the user you wish to remove from the system.
NOTE:
If you only want to hide or in-activate the user for a period of time, it is better to edit the user info and un-check the 'Active' box and Save. Thus, you do not have to create the user again at a future point in time. Remember, creating a user will create a new unique 10 digit number. Also note that deleting a user will not delete their historical store visits in the system.