Store Assignment
Administrators can use 'Store Assign' feature to associate users and stores in their sales geography. They can also select the frequency of visit of the user to each of his/her assigned store. Store visit compliance of a user is measured against this preset visit frequency. Admins will be able to use filters to search, find and selectively assign store locations to reps. This will be very helpful for countries that have several hundreds or thousands of stores in the database and previously had to sort
through many pages to find the right ones.
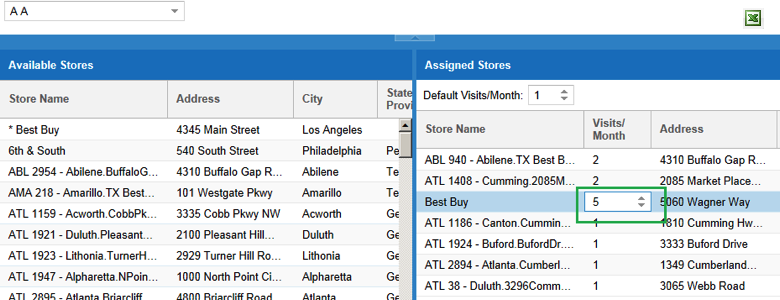
Upon clicking 'Store Assign' sub tab or link, you will land on 'User Store Assignment' page which will look like the picture shown below:
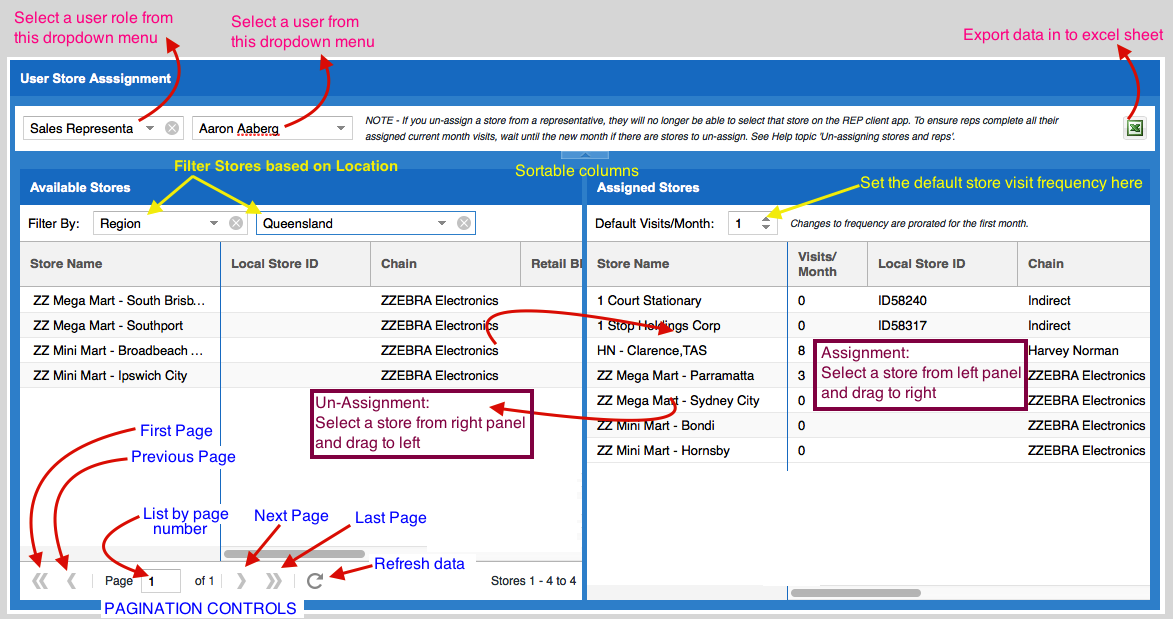
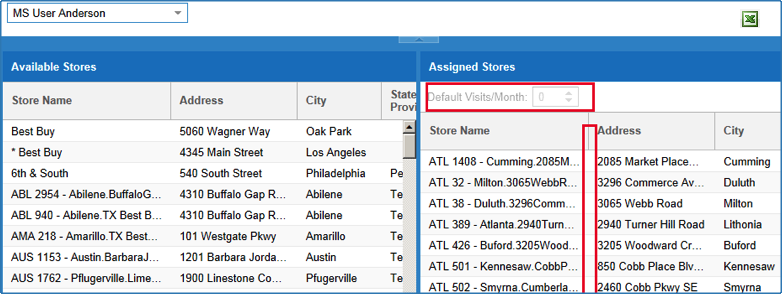
The page has 3 panels. One horizontal panel at the top for user selection, which can be hidden or unhidden. Underneath that, there are 2 vertical panels aligned adjacent to each other. You can select users from the drop down menu on the left side of the top horizontal panel. There is an excel icon at the right end of the horizontal panel. Click on that to export/download the list of all user - store assignment list as a spreadsheet. The left vertical panel is to list all available stores in the country / sales geography. The right panel is to list down those stores to which the selected user is assigned to (or already assigned to).
Start by selecting a user from the drop-down menu in the top horizontal panel. User list in the drop down menu is sorted in the alphabetical order of their surnames.
Once the user is selected, select a store from the left panel with mouse left click, then drag and drop in to right panel. The store will then get listed in the right panel table. This action assigns the user to that store. You can assign any number of stores to the user in this way. If you want to remove the assignment of a store from that user, just do the opposite, i.e. drag and drop the store in concern from the right panel to the left.
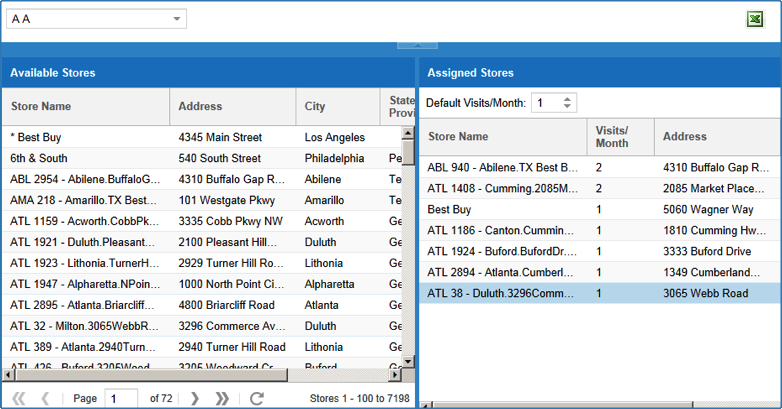
Once the stores have been added to the right, the column that displays 'Visits/Month' becomes editable (refer to the picture below). This field is to select the store visit frequency. You can click on the increment or decrement buttons to change the frequency.
To remove a store assignment, drag the store from 'Assigned Store' list on the right panel to the left panel ('Available Store' list).
It must be noted that store un-assigning action takes effect instantaneously. When a store is un-assigned, the user will no longer be able to see/select that store on his/her REP client app. So, to ensure reps complete all their assigned visits for the current month (unless that is required), please wait until the new month falls before stores are unassigned. Once a month begins, any un-assignment will not take effect until the following month. Any additions will be pro-rated based on how far into the month it is when the change is made.
Note:
If you see that the Default Visits/Month is dithered and the Visits/Month Column is not visible, then store visit compliance aspect for this user is turned off. You can turn that on by going to User Management page and editing the user type (title) associated with that user. But remember, doing this will change the store visit compliance for all users with the same user type / title. The red markings below show what this looks like when compliance is turned off in User Titles.